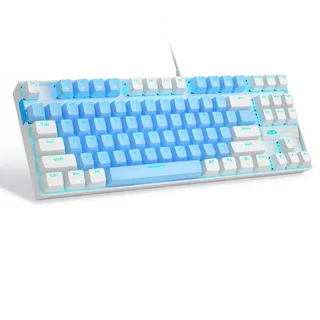
Custom mechanical keyboards have grown in popularity among enthusiasts and professionals alike. One of the most sought-after layouts is the Tenkeyless (TKL) keyboard—a compact design that eliminates the number pad while retaining essential keys. If you’re considering building a custom TKL keyboard, here’s what you need to know to get started.
Why Choose a TKL Layout?
The TKL layout is ideal for those who want a balance between functionality and desk space. It provides:
- More room for mouse movement (especially helpful for gamers)
- A cleaner, more minimalist workspace
- Essential keys for productivity, minus the unused numpad
Because of these advantages, many users find the TKL form factor to be the sweet spot between full-size and 60% keyboards.
Key Components You’ll Need
When building a custom TKL keyboard, gathering the right parts is crucial. Here’s a quick checklist of what you’ll need:
1. Keyboard Case
Choose a case designed specifically for TKL layouts. Materials range from plastic to aluminum and even acrylic, depending on your budget and aesthetic preferences.
2. PCB (Printed Circuit Board)
The PCB is the brain of your keyboard. Look for hot-swappable PCBs if you want to change switches without soldering.
3. Plate
The plate holds your switches in place and adds to the overall feel. Common materials include aluminum, brass, and polycarbonate.
4. Switches
Mechanical switches determine how your keyboard feels and sounds. Choose from tactile, clicky, or linear types depending on your typing preference.
5. Keycaps
This is where you can get creative. Keycap sets come in various profiles (like SA, DSA, or Cherry) and materials (ABS or PBT).
6. Stabilizers
These are essential for larger keys like Shift, Enter, and Spacebar. Lubing your stabilizers can greatly improve the typing experience.
Tools and Accessories
- Soldering kit (if not using hot-swappable PCB)
- Keycap puller
- Switch puller
- Lubing kit
- Screwdriver set
- Tweezers
Taking your time to prepare the right tools will make the building process smoother and more enjoyable.
Assembly Tips
When building a custom TKL keyboard, it’s important to be patient and detail-oriented. Here are some helpful tips:
- Test the PCB before assembly to ensure it’s functional.
- Lubricate switches and stabilizers if desired for a smoother feel.
- Take cable management into account to avoid interference with key switches or the case.
If you’re new, consider watching build videos or joining keyboard communities for advice and guidance.
Final Thoughts
Building a custom TKL keyboard: what you need to know goes beyond just picking parts—it’s about creating a personalized typing experience. Whether you’re doing it for improved ergonomics, better aesthetics, or performance, the TKL layout offers a solid middle ground for many users. With the right components, a bit of patience, and attention to detail, you can create a keyboard that feels uniquely yours.


